Monday, December 31, 2012

Gas Pump

I just loved Paper Phenomenon's gas pump.  I just had to make it.  My Grandfather collected old cars and I think this is the perfect place to showcase his pictures of them.  I got the tutorial on Paper Phenomenon's site.

Hello Kitty Cozy Coupe

I didn't take any pics of the process but take my word for it, these were grungy, used and disgusting cozy coupes.  I bought these off of craigslist over the summer and yes, I waited until 2 days before Christmas to start painting them.  That smart idea left me out in the dark and into the freezing cold all day on Christmas eve but I got them done!  I think less procrastination should be a New Year's resolution.  So this is how the girls found them Christmas morning.  I may have gotten a little excited and went overboard. (Remember, Ruby is only 2 weeks old at this point, lol.)   When Charlotte saw her car she got so excited and she crawled over, opened the door and climbed in.  We had to move the cars to another room to get her to open gifts!  The process was super easy!  Although, it was a real you know what to get the wheels back on the big one.  I just turned a Hello Kitty pic I found on google into an svg and used the curly font I downloaded from one of those free font sites into scal.  I love that font, I've don't some embroidering with it too.  I cut it all out of vinyl.  I did use a plastic primer before I painted the cars because the pink I used was not the kind made for plastic unless you primed. 

Go Patriots!

I made these items for my husband for Christmas to decorate his "man cave".   I got the embroidery images from etsy and I used an svg to make a stencil and glass etched the glasses. 

A Christmas Story Shadowbox

My family are huge fans of this movie!  So I figured I had to make something to show our love for it!  I tried to make the tree look lopsided like theirs and added the BB gun in the background.  My plan is to put pics in the front pocket from when my husband took Kayla to the house (now a museum) that the movie was filmed.  See post below for more details.

Santa Shadowbox

This is my personal design!  I used a 7 gypsies window and constructed the box to work with it.  I created the tree and fireplace svgs.  The paper is BoBunny/ Father Christmas.  I put real lights on the tree.  The lights are battery operated mini lights I found at Hobby Lobby.  I just poked a hole in the back and mounted the battery pack to the back.  I also used figures from the mini doll items at Hobby Lobby.  I made a pocket on the inside of the door and placed postcards from the canvas corp collection there.  I plan to have the girls write their "Dear Santa's" on the front and place the pic with their gift on the back.

Cookies for Santa Recipe Holder

I made this box for the design team at ssd.  It's all canvas corp or 7 gypsies products.  The Santa is from svgcuts.com and I used the glue/shaving cream technique on him.  I don't think I did it right and if I did, I'm not a fan.  I made a little box filled with recipe cards behind the Santa and you can trade them out to display your favorite cookie recipes.

Baby Ruby!

I'm excited to say baby Ruby was born on 12-11-12!  She's doing well and her sisters just adore her!  We have already completed her adoption and I'm getting used to having an 11 yr old, 11 month old and a newborn.  My crafting may have to slow down a bit, I think I'm gonna have my hands full, lol!

Dr. Seuss Tutu Bow Holders

I found the info to make these cute bow holder tutus on http://www.girlythingsbows.com/ballet_tutu_bow_holder.html I got the paper on etsy and printed it with a 12x12 printer.  Since the girls are sharing a room, I made all of Charlotte's things with the "cat hat" and Ruby has the "things" theme.  I used a diaper box for the body and an infant sized hanger for the top.  I figured I might as well reuse the boxes, they are running out of my ears around here with 2 in diapers now!


Wizard Of Oz Party Invitations

We made these little baskets and filled them with lollipops as the invitation for the Halloween party.  The basket was an svg from myscrapchick and I'm not sure where I got the stamp set, maybe graphic 45.  The scroll on attached with ribbon is the actual invite saying the Lollipop Guild invites you t have tea in the field of poppies.  See older posts for more Wizard of Oz fun.

Sunday, December 30, 2012

Dr. Seuss burp cloths

Here is a pic of the burp cloth I made for Ruby.  Thing one and thing two is her theme!

Embroidered Christmas Shirts

Here are some shirts I embroidered for Christmas.  I got all the designs from etsy.

Mustache Fun!

I made Charlotte a mustache shirt and bow!

I designed this book from scratch.  It's posted all "fancy like" on the canvas corp blog with all the info.  I made it for a blog hop they were doing.  Below are some extra pics of it but it looks much better on their site.  Head over there for a better look.  http://canvascorp.com/2012/11/09/canvas-corp-and-authentique-blog-hop-day-4/ I am pretty pleased with how it turned out.  Check out my nice hand model, Renee, with the pretty nails!


Halloween Embroidery

I embroidered the kids some shirts for Halloween.  I got the designs from etsy.  I'm finally getting the swing of the embroidery machine!

Monster Shadowbox

Here is a shadowbox I made.  I used canvas corp canvas and paper and glimmer misted the paper and cheese cloth curtains.  I just sealed a laminating pouch and used it as the window.  The hand is on a cricut cart. 

Friday, December 7, 2012

Wizard of Oz Party

Here are some pictures from the party.  We always set up in the garage in case of bad weather.  We had "tea" in the field of poppies as part of our theme.  The poppies are made of napkins and the shoes are an svg and we filled them with Oreo cookies.  I bought the mix-match china from a thrift store a few years back when we did the "Mad Hatter Tea". 


Wizard of Oz costumes

Every year my daughter, Kayla, has a themed Halloween party with her friends.  This year she picked The Wizard of Oz.  Here are a few pictures of my kid's costumes I made.  Kayla is Glenda the good witch and Charlotte is Dorothy.  I made both costumes using the Simplicity patterns made for the theme and I stitched Charlotte's basket out of plastic canvas.  Sears did the pictures again this year.  Shout out to Jessica at the Fayetteville studio!  I can't post all the pics because they have other children in them but she did an excellent job again this year setting up the props!


Saturday, September 15, 2012

Halloween Fun

I made these projects for the design team at SSD.  Everything except the ribbon/trim, beads & owls are from Canvas Corp.  I got the ideas from http://happylifecraftywife.com/?cat=404&paged=3  I just found her blog and LOVE IT!  She also has the link for the site to buy the cage svg.  The tree and tag I googled and found for free.  I used my Silhouette and SCAL.  The rose is from Cricut/ Giant flowers.  The rosettes I did by hand. I adapted the hat and made it smaller and didn't use the cone, I just twisted the paper until I liked the look.  I hope to make a couple more projects if time permits.  I have lots to do to prepare for Kayla's Halloween party!  Including making a few costumes.  Scrap booking will just have to take a back seat for now.  I will post all the fun soon!


Monday, September 10, 2012

Another Canvas Corp / Sweet Stamp Shop Blog Hop

Here is the second project I did for the blog hop.  I made a file folder album.  I used the beach theme with the matching blue & cream patterned papers from Canvas Corp and the Under The Sea stamp set from Sweet Stamp Shop.  I used chandelier glimmer glam on the tail, sea weed, and shells.  I used coral reef glimmer mist on the shells and starfish glimmer mist on the hair.  I plan to add a picture on a mat of each of my 3 daughter's first time at the beach.  I will have to wait until this Summer after Ruby gets here (Due in December) and we go "home" to Florida for a visit to see family.  I will then also add a family picture in the fourth pocket.  I thought this would be a fun way to remember their first time seeing the ocean.


Tuesday, September 4, 2012

Canvas Corp / Sweet Stamp Shop Blog Hop

I made this for the Canvas Corp / Sweet Stamp Shop Blog Hop.  I used the Out in Space stamp set from Sweet Stamp Shop and Blk & white swirl, blk & white and red & white dot papers on a 6x6 canvas from Canvas Corp.  I used Calypso and Pearl Gilmmer Mist from Tattered Angels on the rocket and moon.  I sealed a laminating sheet and cut it down to cover the shadow box and stamped the stars and saying, "fly me to the moon" on the outside. (Sorry, you can't see it well for the glare.) Although, I don't have a little boy, I had a BLAST making this project!

Sunday, September 2, 2012

Dr. Seuss Nursery

Here Charlotte is already 7 months old and I'm still not done decorating her room.  And now I'm adding all the extras for little Ruby too!  I will have them share a room while they are little and move Charlotte into a "Big Girl" room in a couple of years.
So here are some pics of the work in progress:
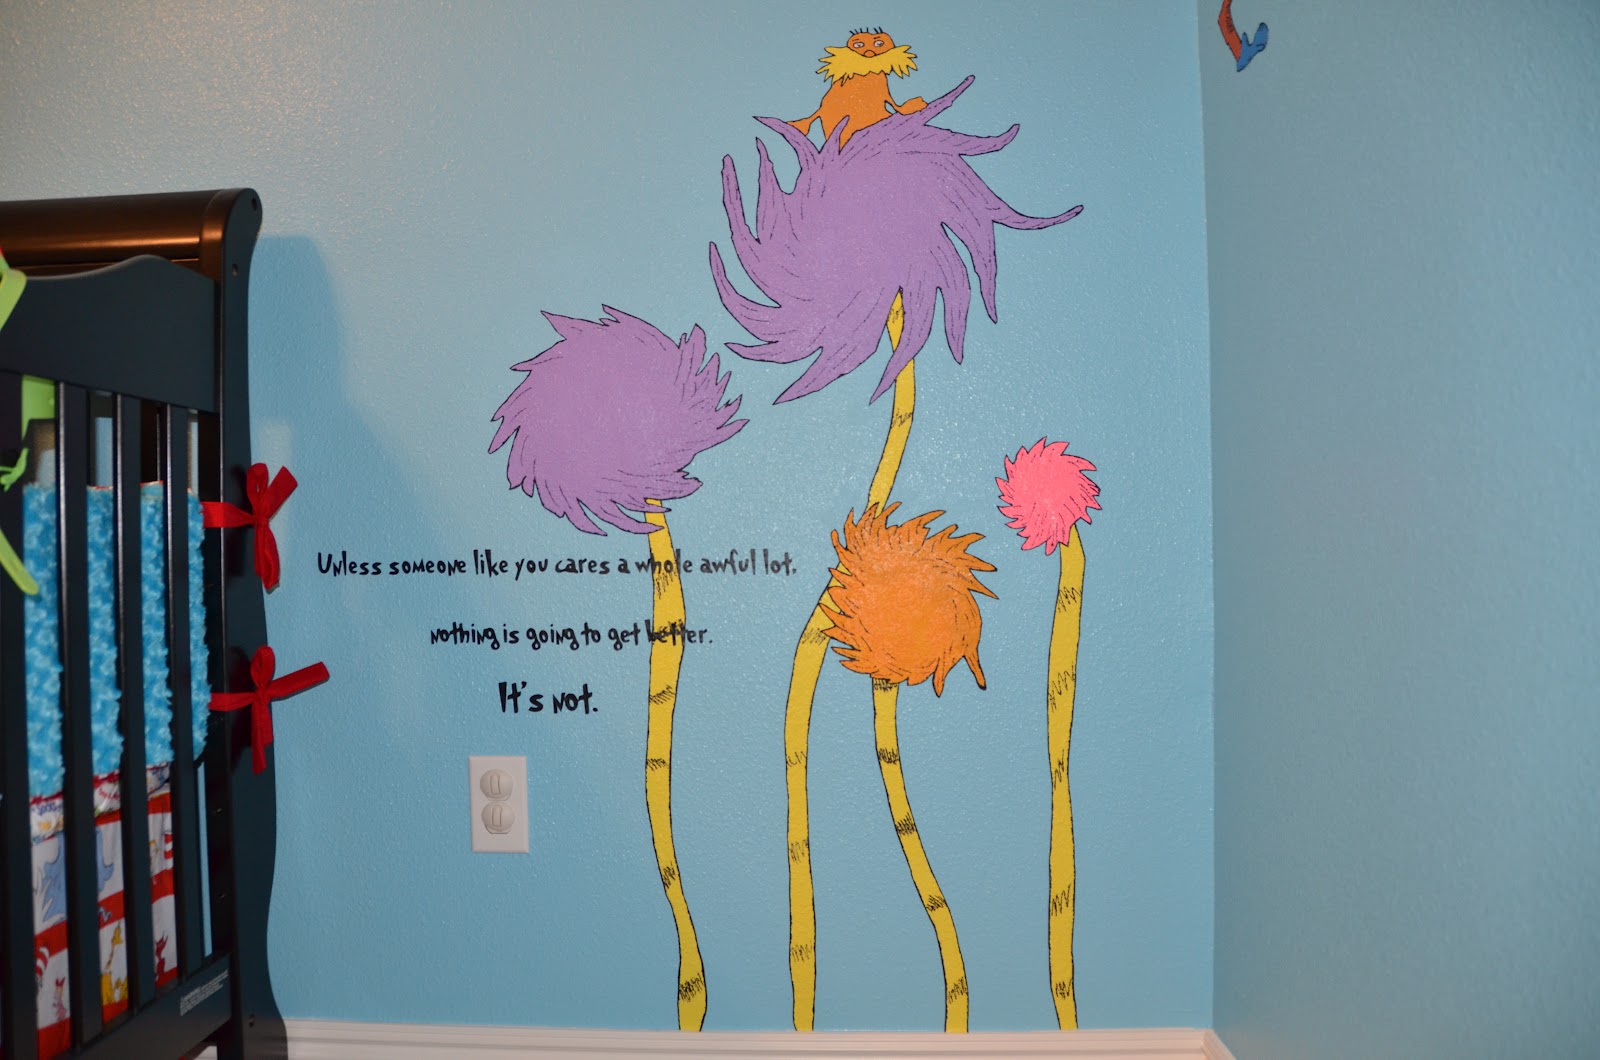
I made the wall murals by tracing them onto paint on wallpaper.  I bought an EZ Tracer at Hobby Lobby ($19.99 w/ online coupon).  I got the paint on wallpaper (has the orange peel texture to it) for $16.99 for 50 yards (I think, it was a huge roll) and the border paste for $5.99 at Lowe's.  The acrylic paint was less than $1.00 on sale each at Hobby Lobby and the acrylic spray sealer came from Walmart for a few bucks.  Overall, I spent less than $60 to do all the characters plus I have a ton of paper left over.  You can find people selling these for close to $40 a piece for the good sized ones on ETSY.  I thought I'd save the money and do them myself!
1. Tape a piece of wallpaper on the wall and print out the picture you want to trace.
2.  Put it under tracer and trace with a pencil.  I made sure the image was small enough I got the entire image in the box of the tracer and didn't have to move it around.  Some images were a little blurry but I just drew it in as best I could. 
3.  Take off wall and paint.  Then after it's dry, I went over all the lines with a sharpie.
4.  Cut it out!  After I cut it out I went back over the cut edges with the sharpie so you couldn't see any white.  Spray with acrylic spray and let dry overnight.
5.  When hanging them up, more is more!  Coat that image good with the border clue, let sit a few minutes and then stick it up.  Press around the edges good so they don't pop up.  You may have to check it and push spots down as it dries.
 
 
                                            I will be adding more characters and sayings later.
 
I cut the sayings with SCAL and I used the Grinched font.  You can dl it for free to use in SCAL.  Just search google.  Thanks for the sun and moon, Auntie Renee!
 
This is Charlotte's bedding I made.  I got the fabric from Fabric.com and the pattern for the sheets from http://everythingyourmamamade.com/2008/02/06/crib-toddler-bed-sheet-tutorial/ and the pattern for the bumper pads with piping from http://lellaboutique.blogspot.com/2011/08/baby-bumper-pads-tutorial-giveaway.html.  I just measured and sewed the ruffle and valance.  I hit a really good coupon at fabric.com and was able to get enough fabric to make 2 complete bed sets for just over $200 with lots of extras.  I can probably get a couple outfits out of the leftover fabric depending on how crazy I get with the quilts I'm going to make.  I'm also going to make a chair pad to help cover the brown rocking chair.  That chair was given to my Mother from my Granny that passed away recently.  They rocked me in that chair and I have rocked both of my babies and my arms are aching to rock little Ruby in it.  I'm also thinking of adding a dresser in front of the window. 
 
 
Tim always brings back piggy banks from the places he travels.  Charlotte's shelf is already filling up!  The other 2 shelves will have the keepsake baby blocks I'm working on.  I will post them when I'm done.
Kayla (11 years old)  helped paint the Lorax!
All the sayings are cut with SCAL on removable vinyl.


Ruby's crib will go under her name when we get it.
 
The empty area will become the reading nook.  I am going to add the characters from The Cat In The Hat Knows A Lot About That! on PBS.   Charlotte loves the show!
 
I hope to work on it more after Halloween. I'm happy with the way it's turning out so far, and hope to finish it before before the girls grow out of it!  I will post updates soon.